User Registration
1. Introduction
This function is used to create a user name and user password for login in the OVMP system.
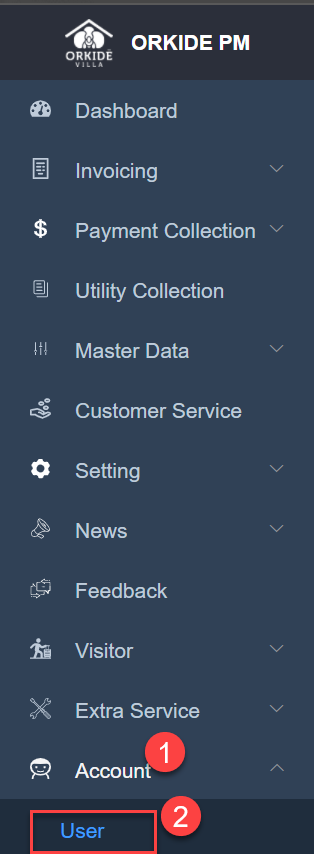
2. Account => User
Please follow the below step to navigate to the screen


Pre-requisites
- Already created role for the user (Go to the user manual of user role)
- Staff info has been created from the OSD system.
3. Process Followed
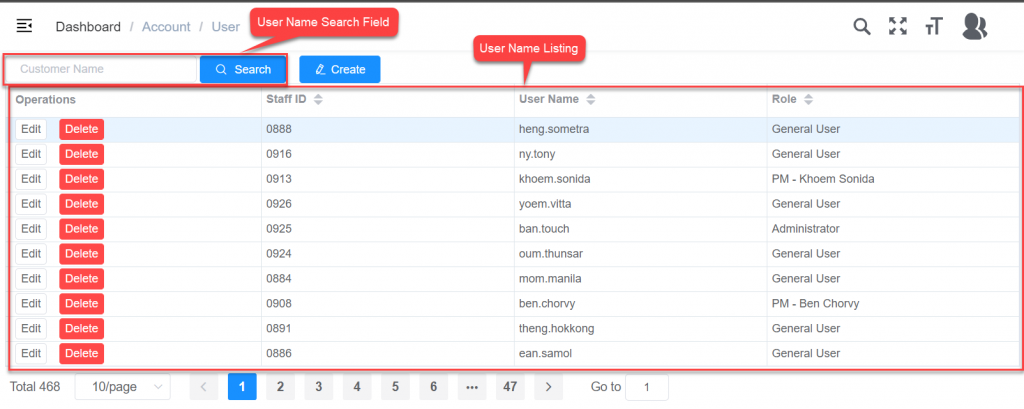
- Go to the Account menu and click on User Sub-Menu. User listing will be displayed.
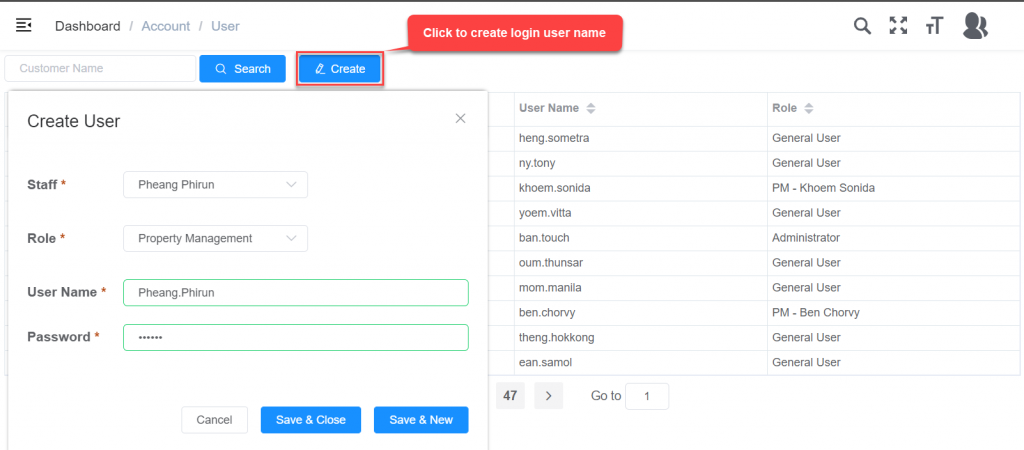
- At the user listing screen, click on create button. Creating screen will be pop-up after that fill in all the required user fields the click saves button to save data.
4. Screen Glossary
4.1 User Name Listing


| No. | Field Name | Field Type | Description of Data |
| 1 | Customer/Search | Search field | This field is used to search customer names by inputting customer names. |
| 2 | Create | Button | This button is used to create a new user. |
| 3 | Operations | Auto Populated | Displayed the data action (Delete, and Edit). |
| 4 | Staff ID | Auto Populated | Displayed Id Staff of user name. |
| 4 | User Name | Auto Populated | Displayed name of the user. |
| 5 | Role | Auto Populated | Displayed role name of the user. |


| No. | Field Name | Field Type | Description of Data |
| 1 | Staff | Data Select | Select the name staff name that has been created from the ODS system. It’s a compulsory field. |
| 2 | Role | Data Select | Select the role of the user that has been created for the user name login requirement. It’s a compulsory field. |
| 3 | User Name | Data Entry | This field is used to create a username when login into the system. It’s a compulsory field. |
| 4 | Password | Data Entry | This field is used to assign passwords to usernames when login to the system. |
| 5 | Cancel | Button | This button is used to clear all data and back to the statement screen. |
| 6 | Save & Close | Button | This button is used to save the transition and close the screen. |
| 7 | Save & New | Button | This button is used to save the transition and stay on the same screen. |


